Search another article?
The dashboard panel allows you to manage the dashboards.
Main Page
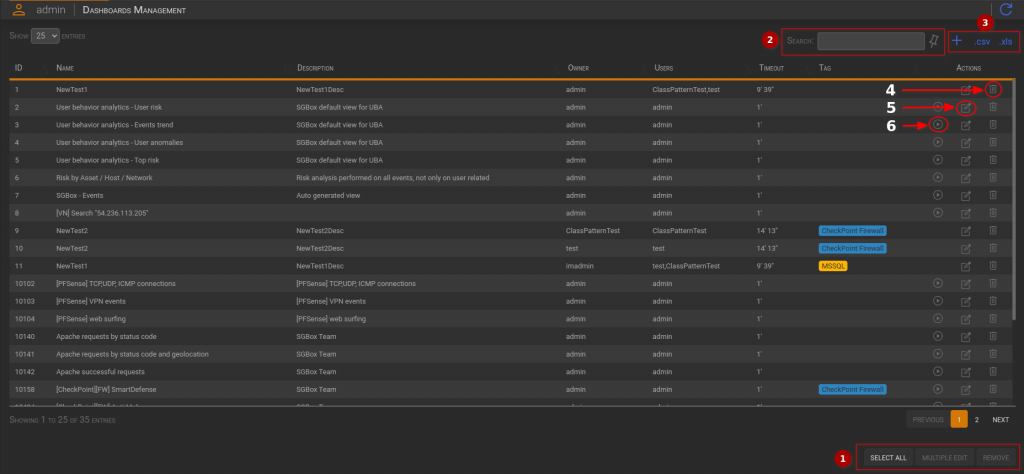
- Actions box
- Select All: Select all the dashboards in the table.
- Multiple Editing: It will open a dialog that allows the multiple editing of selected dashboards.
- Remove: It will open a dialog that allow the tags removal.
- Filter box
- Input field: It is used to filter the entire table. The filter value is compared with all the cells.
- Pin Icon: The icon is used to pin the filter after an hypotetical reload.
- Table Actions box:
- Plus icon: It opens a dialog that allow the “Dashboard Added”
- .CSV: Downloads the table in CSV format.
- .XLS: Downloads the table in XLS format.
- Edit icon: It will open a container that allow the Dashboard Editing
New Dashboard
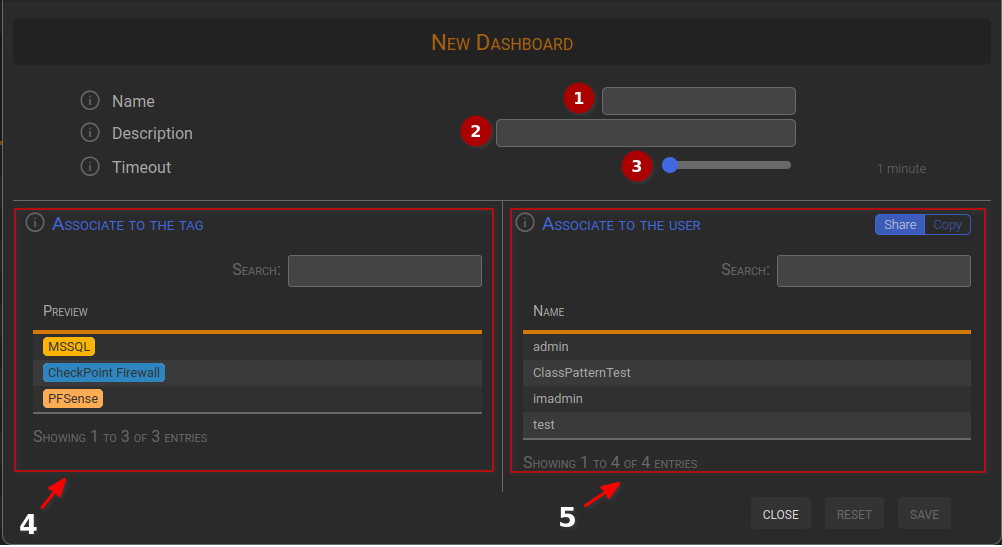
- Name: It is the name of the dashboard
- Description: It is the description of the dashboard
- Timeout: It is a parameter used to specify the interval at which the dashboard data will be updated.
- This section is used to associate the dashboard with the selected tags. You can click on the line to select the tags.
- This section is used to associate the dashboard with one or more users. You can click on the line to select the users.
- Share: The dashboard will be available for the selected users.
- Copy: The selected users will have their own dashboard
Edit Dashboard

- Name: It is the name of the dashboard
- Description: It is the description of the dashboard
- Owner: It is the dashboard creator. It is not editable.
- Timeout: It is a parameter used to specify the interval at which the dashboard data will be updated.
- This section is used to associate the dashboard with the selected tags. You can click on the line to select the tags.
- This section is used to associate the dashboard with one or more users. You can click on the line to select the users.
- Share: The dashboard will be available for the selected users.
- Copy: The selected users will have their own dashboard
- Shared icon: This indicates that the dashboard is shared with emphasized users.

Multiple Editing
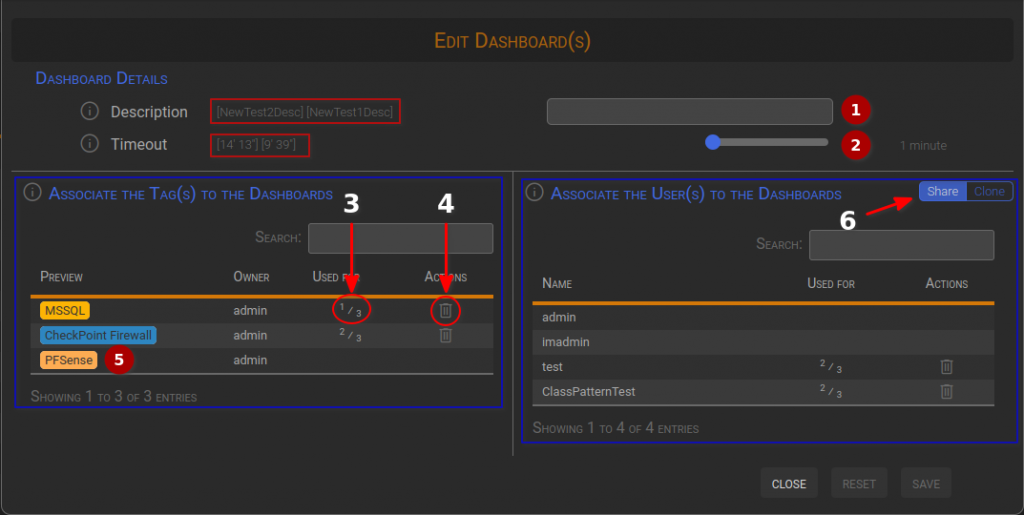
- Description: It is the description of the dashboard
- Timeout: It is a parameter used to specify the interval at which the dashboard data will be updated.
- Used For: this field reminds how many selected dashboards are associated to the element (in this case, tag)
- This line displays the Remove icon, so you can delete all the associations with the tag.
- This line does not display the Remove icon, so you can add the association dashboard-tag
- This section is used to associate the dashboard with one or more users. You can click on the line to select the users.
- Share: The dashboard will be available for the selected users.
- Copy: The selected users will have their own dashboard
Delete Dashboards
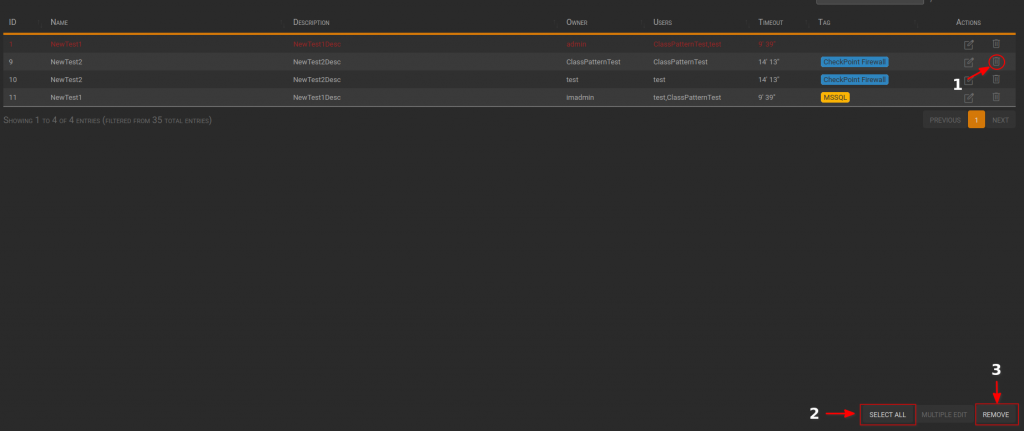
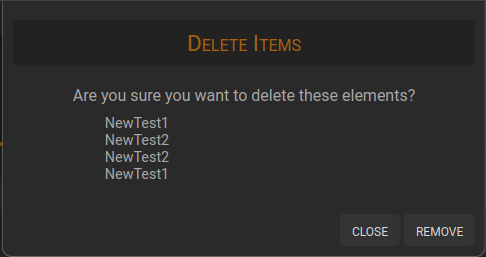
It displays the selected dashboards as a reminder.
Click remove to apply the deletion.


