Search another article?
Network Panel
The network page allows to show all hosts present in the internal database of SGBox.
Document Index
- Main Page
- New Network
- Select Single Network
- Select All
- Modify Network
- Multiple Editing
- Remove
- Discovery Host
- Remove
Main Page
The Functions box allows different actions:
In the (3) box:
- .csv downloads the table as csv file.
- .xls downloads the table as xls file.
- The plus icon allows you to add a new network.
In the search field box (3) you can filter the results of the table. The system searches for each field of the table based on the characters in the input field.
Clicking on the pin icon (4) pins the filter for a future use. If it is blue the filter is pinned.
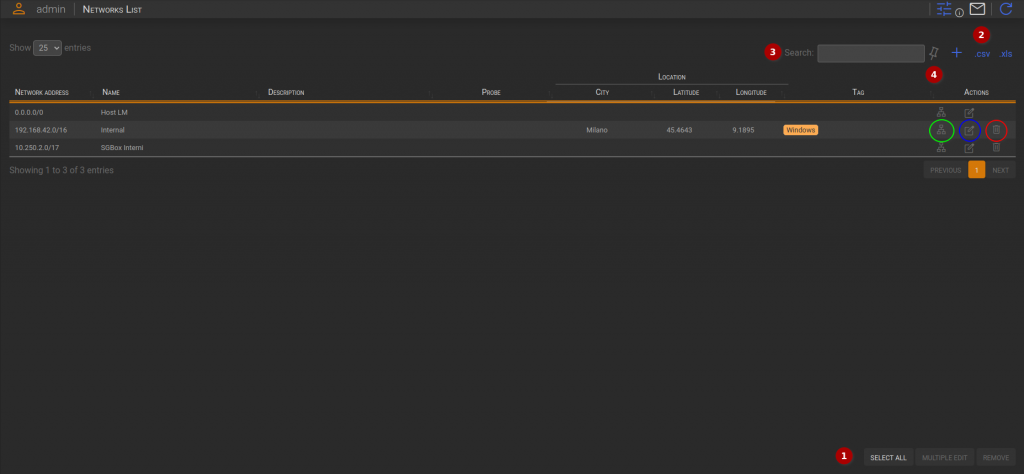
- The green circled icon shows the hosts belonging to the network
- The light blue circled icon allows you to edit the information related to the network
- The red circled icon selects the network to enable removal.
New Network
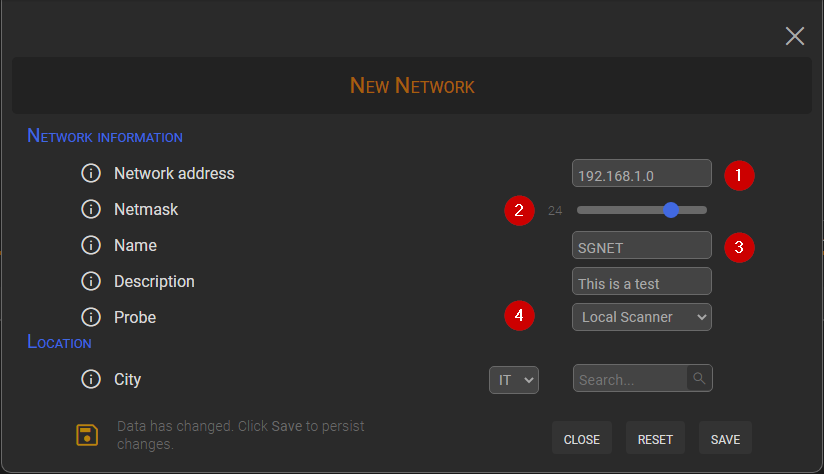
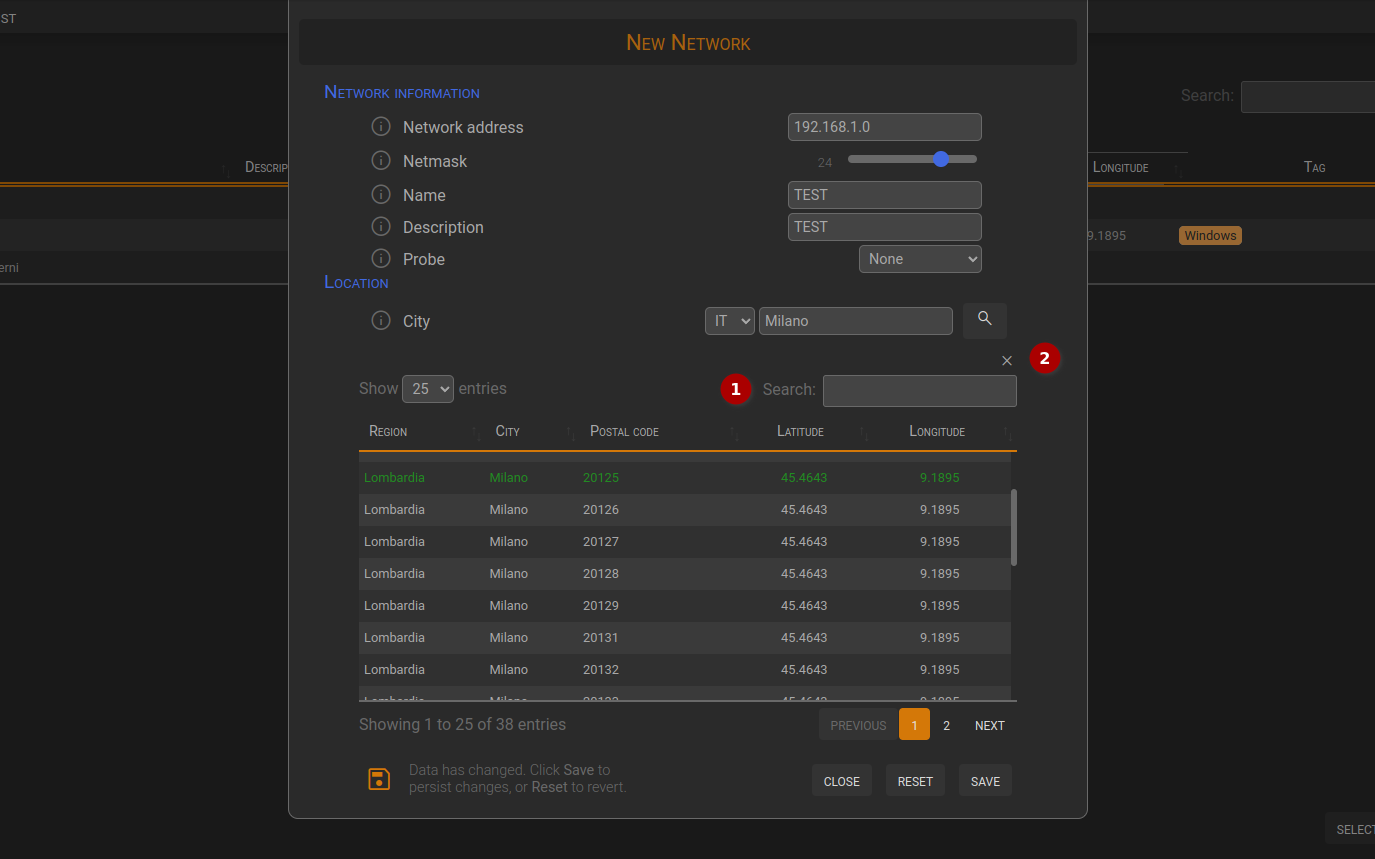
This modal dialog allows you to add a new network. The description and the location are optional. You can associate a location by searching for at least 3 characters in the input field and then selecting one of the results.
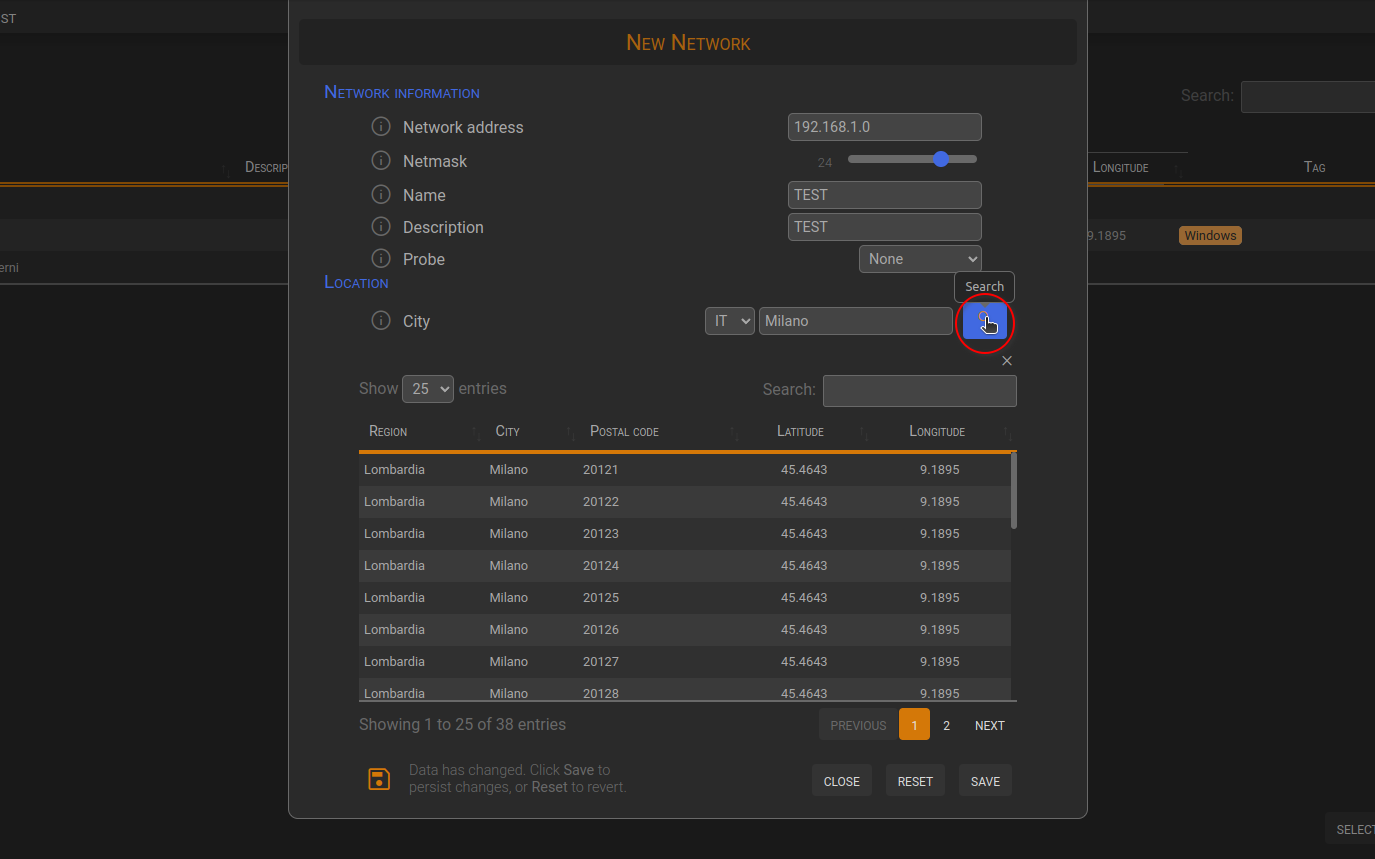
To cancel your choice you can click again on the row. To clear all the input field, you can use the reset button.
Select Single Network
By clicking on the row you will be able to perform the following actions:
If you previously selected at least two networks, you will be able to perform these actions:
Select all
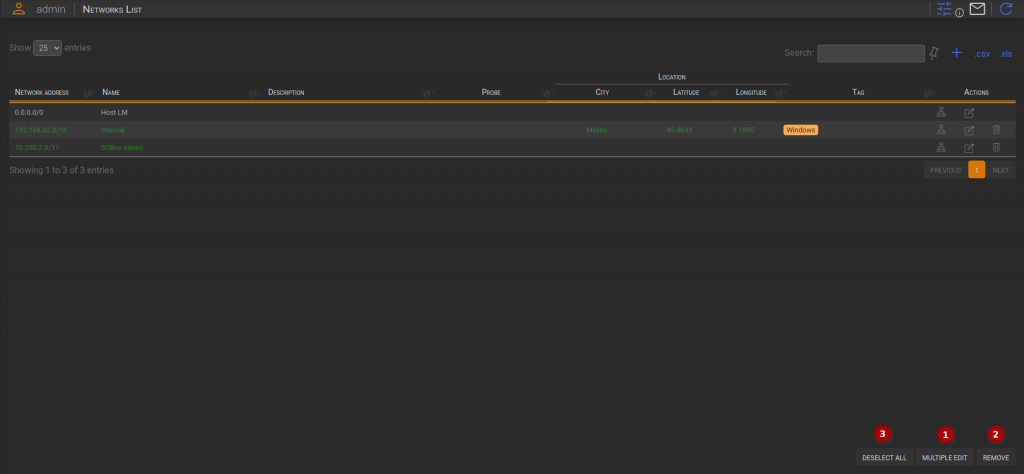
By clicking on the select all button, the rows (networks) will be selected. After clicking on the select all button:
- You can edit multiple networks (1) or remove (2) them.
- The button changes to “Deselect all” (3) to deselect all rows, clear the search input field, and reload the networks.
Functions:
Modify Network
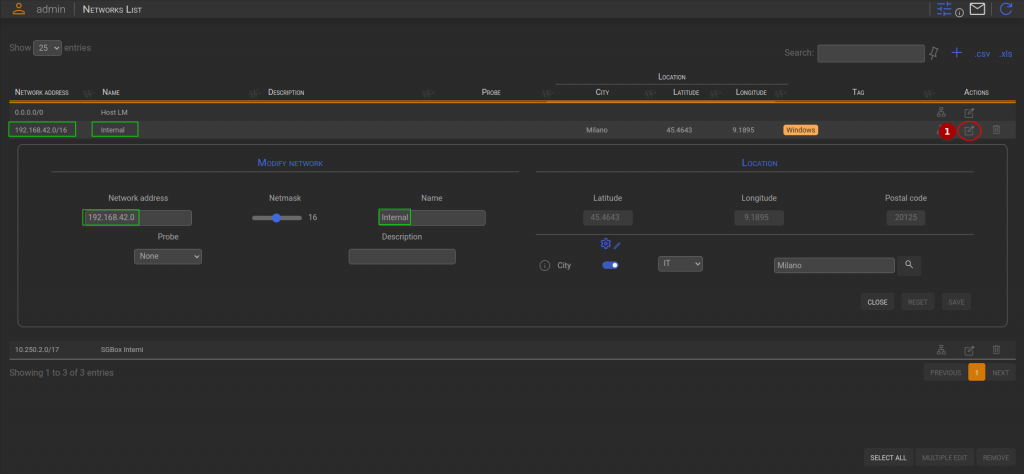
This macro area is displayed by clicking on the Edit icon. (1)
It reports the information in the input field and enables editing of the network.
Modify network area
In the “modify network” section, you can modify the network information. It’s important to enter the network address correctly, as the system rejects these types of addresses:
- 1.1.1.01
- 30.168.1.255.1
- 127.1
- 192.168.1.256
- -1.2.3.4
- 1.1.1.1.
- 3…3
- 192.168.1.099
All the fields are editable.

Location area
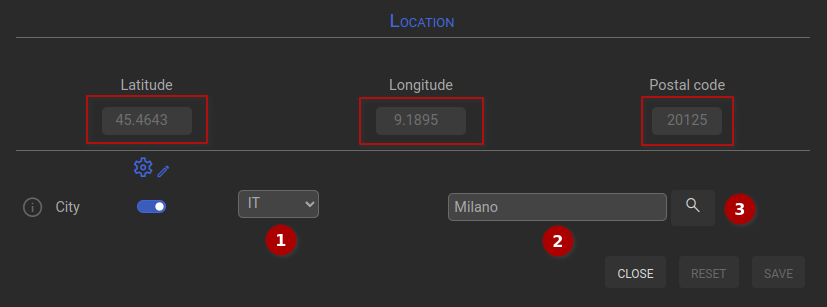
In the “Location” area, you can modify the location associated with the network. The first three input fields allow the user to find more details about the selected city.
To search for a location, you need to first select an available country from the drop-down list (1). Then, you must enter at least 3 characters in the input field (2) to enable the search button. Once the location has been selected and applied, you can remove the association by turning off the switch.
Multiple editing
This view enables the editing of the selected networks. It performs the same functions of the Modify Network view. The common information of the networks selected is reported in the first red rectangle.
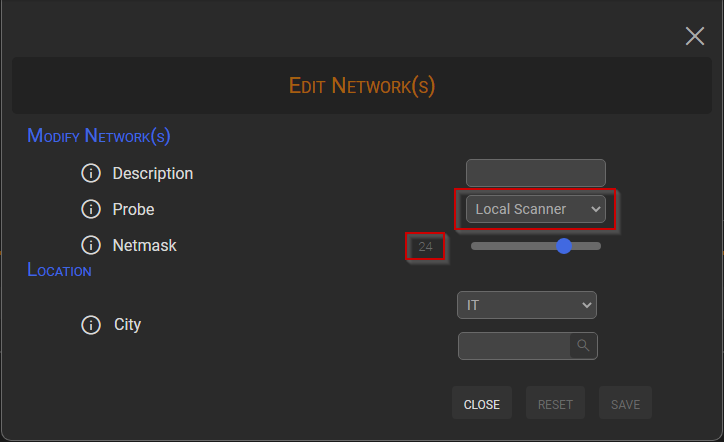
The view shows the different information of the networks selected in the second red rectangle
Remove
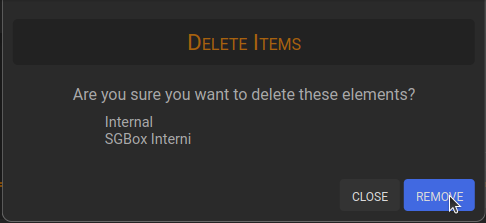
To delete one or more network the user have to select the trash icon(1) and then click on the remove button (2).
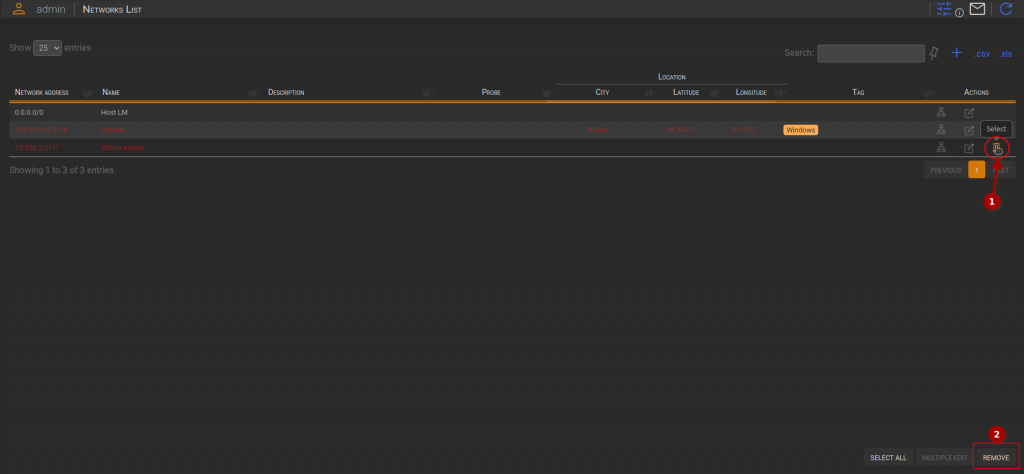
The following modal dialog displays the networks that the user has selected. To delete them, simply click the “Remove” button.
