Proteggiamo il tuo ambiente digitale da qualsiasi attacco informatico. Sfrutta tutte le potenzialità della piattaforma SGBox!

Gallery

Contatti

Via Melchiorre Gioia, 168 - 20125 Milano

info@sgbox.it

+39 02 60830172

Search another article?

You are here:
< Back


The tag panel allows you to associate a tag to various types of elements.

Document Index

Main Page
Tag Panel – Functionalities and usage

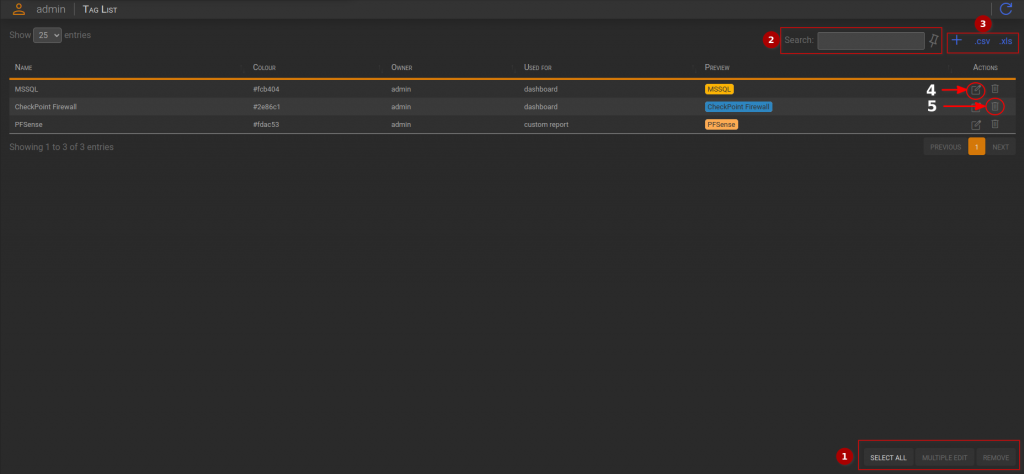
The main page displays the existing tags along with their colors and owners. The “Used for” field indicates the type of elements they are employed for.

      1. Actions box
            • Select All: Selects all the tags in the table.

            • Multiple Editing: Opens a dialog for multiple editing of selected tags.

            • Remove: Opens a dialog for tag removal.

        1. Filter box
              • Input field: Filters the entire table based on the entered value, which is compared with all the cells.

              • Pin Icon: Pins the filter after a hypothetical reload.

          1. Table Actions box:
                • Plus icon: Opens a dialog to add a new tag

                • .CSV: Downloads the table in CSV format.

                • .XLS: Downloads the table in XLS format.

            1. Edit icon: Opens a container for Tag Editing

          New Tag
          Tag Panel – Functionalities and usage

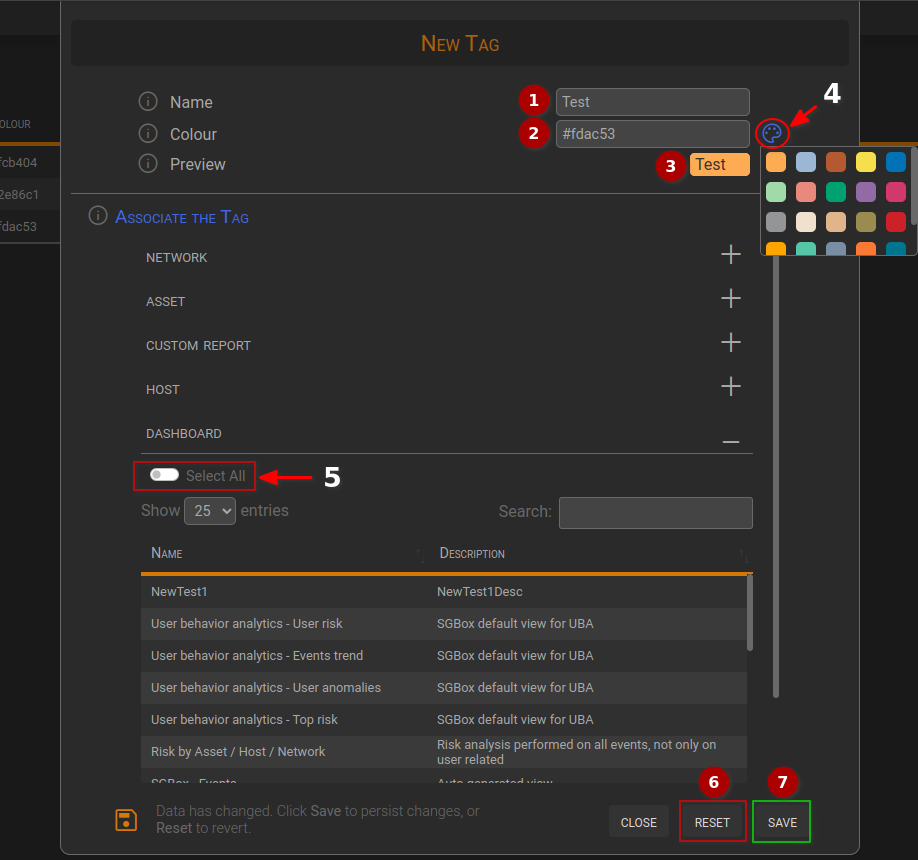
          This dialog allow for adding a tag. The user needs to enter the name and choose a color. Optionally, they can select one or more elements to be associated with the tag. If desired, the user can create the tag first and then choose the elements using the “Edit Tag” option.

              1. Name: It is the name of the tag.

              1. color: It is the HEX code color.

              1. Preview: After selecting the color, the preview shows the updated name and color.

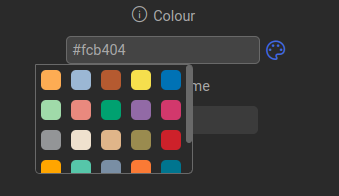
              1. Palette icon: By clicking on this icon, you can open the palette and choose a color for the tag.

              1. Select All switch: Enabling this switch allows you to select all the elements of that category (in this case, dashboard)

            Edit Tag
            Tag Panel – Functionalities and usage

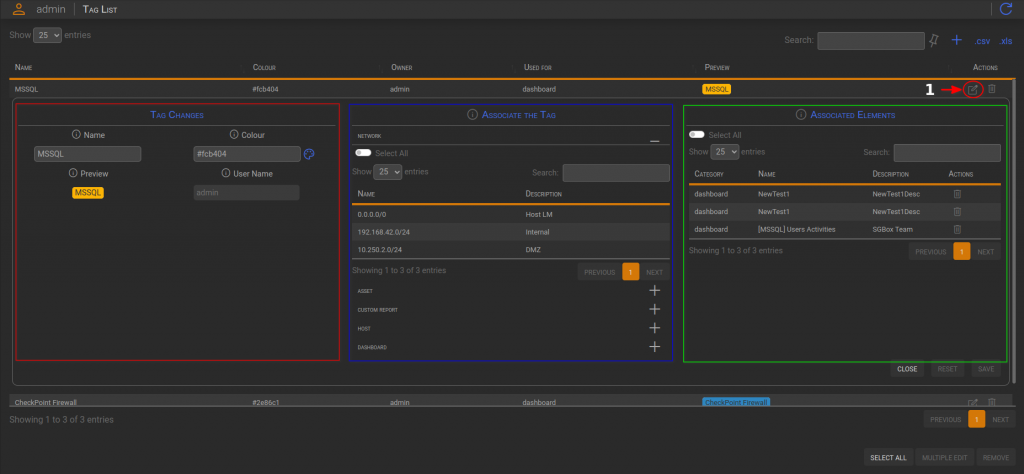
            This macro area is shown by clicking on the Edit icon. (1)
            It reports the information in the input field and allows the editing of the tag.
            Every changes must be applied pushing the Save button.

            Tag Info
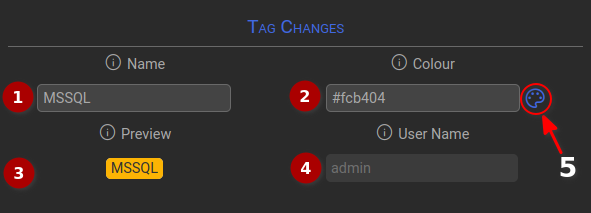
                1. Name: It is the name of the tag.

                1. Color: It is the HEX code color. You can choose a different color by clicking on the palette icon (5).

                1. Preview: After selecting the color, the preview shows the updated name and color.

                1. User Name: It is the tag owner. A superuser has control over all tags, while a user with regular authorization can only control their own tags.

              Associate The Tag
              Tag Panel – Functionalities and usage

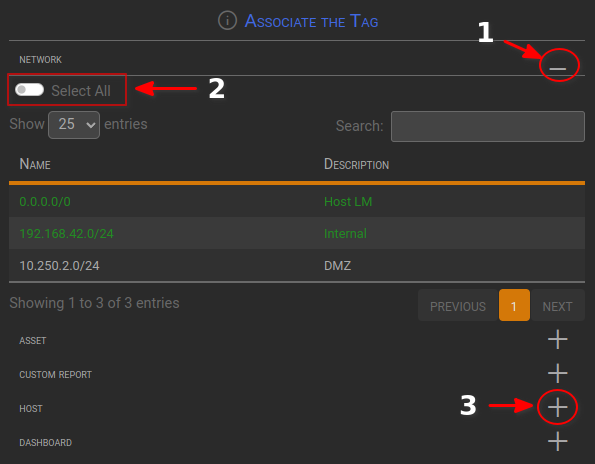
              This section allows the user to associate the tag with various elements. There are different types of elements, and they may become more numerous over time.

                  1. Hide icon: Opens the network container and displays the table for selecting the network. Toggling the click allows the user to select or deselect the element.

                  1. Select All switch: Enabling this switch selects all elements of that category. (in this case, network)

                  1. Expand icon: Clicking on this icon shows the Host container.

                Associated Elements
                Tag Panel – Functionalities and usage

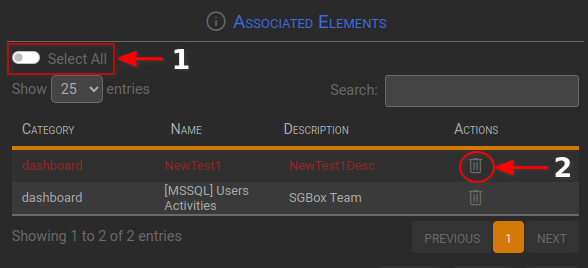
                This section allows the user to remove an association between tag-element.

                    1. Select All switch: Enabling this switch allows you to select all elements without considering the categories.

                    1. Remove icon: Clicking on this icon selects the element to be deleted.

                  Multiple Editing
                  Tag Panel – Functionalities and usage

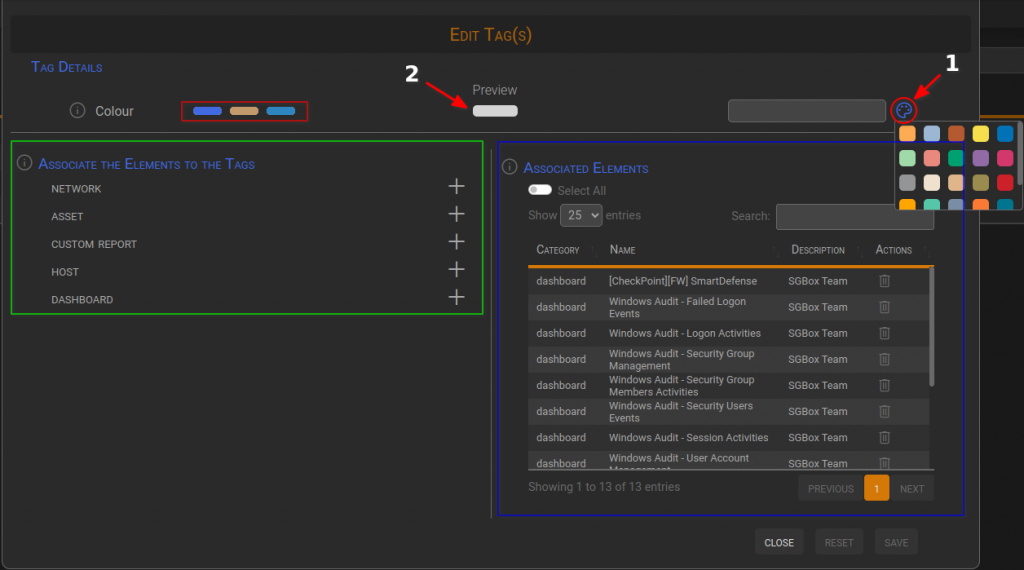
                  This container allows the multiple editing of the previously selected tags. You can select a color and apply it to all the tags.

                      1. Palette icon: Displays the color palette, allowing you to select a color by clicking on one of them.

                      1. Preview: When hovering over a color, the preview shows the how the tag willl appear with that color.

                    The container is divided into two areas:

                        • Associate The Elements To The Tags: You can choose the elements to be associated with the tags.

                        • Associated Elements: This area allows you to select the elements from which the association will be deleted.

                      Associate The Elements To The Tags
                      Tag Panel – Functionalities and usage

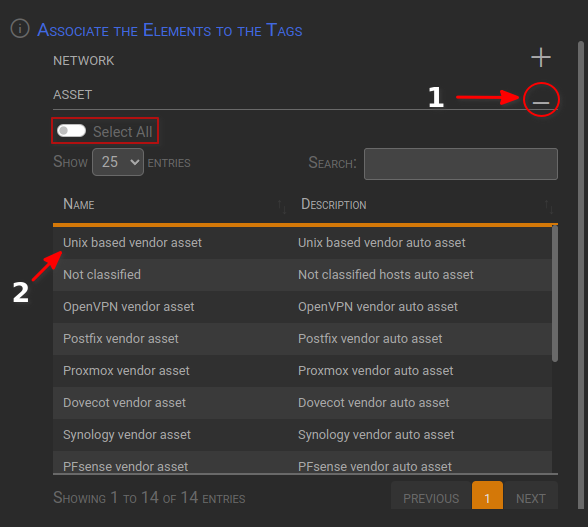
                      This section allows you to associate elements with tags. In this case, the container containing the elements table is opened using the (1) icon. You can select all the assets at once using the red boxed switch.

                          1. Open/Close icon: This icon is used to toggle the opening and closing of the container.

                          1. Clicking on the line will select it and associate it with the tags. Once the changes are saved, the association will be applied.

                        Associated Elements
                        Tag Panel – Functionalities and usage

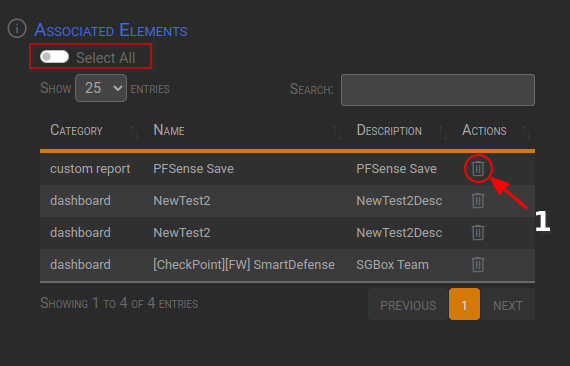
                        This section allows you to remove the tag-element association. You can select all the elements using the red boxed switch.

                            1. Remove Icon: It removes the association of all previously selected tags with the selected element.

                          Delete Tags
                          Tag Panel – Functionalities and usage

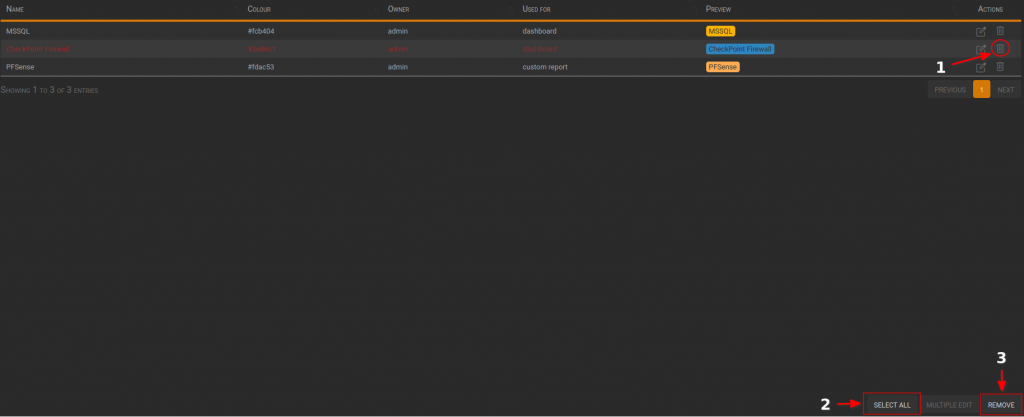
                          To delete multiple tags, first select one of the tags using the Remove icon (1), then press the select all button (2). Once you’ve selected one or more tags, the Remove button (3) will activate.

                          Tag Panel – Functionalities and usage

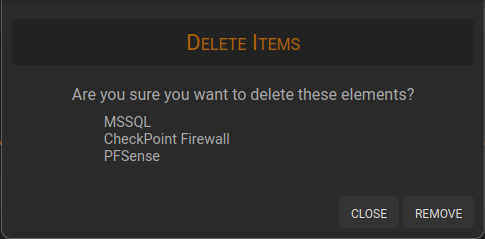
                          After clicking the remove button on the main page, a container will appear, allowing you to complete the deletion
                          It displays the selected tags as a reminder.
                          Click remove to apply the deletion.